Grilled French toast & more

If you want to cook a quick, delicious breakfast this is a great place to start. My three year old son was absolutely in love with eating this today. I do have to say that I was very satisfied myself with the results of my creation today.

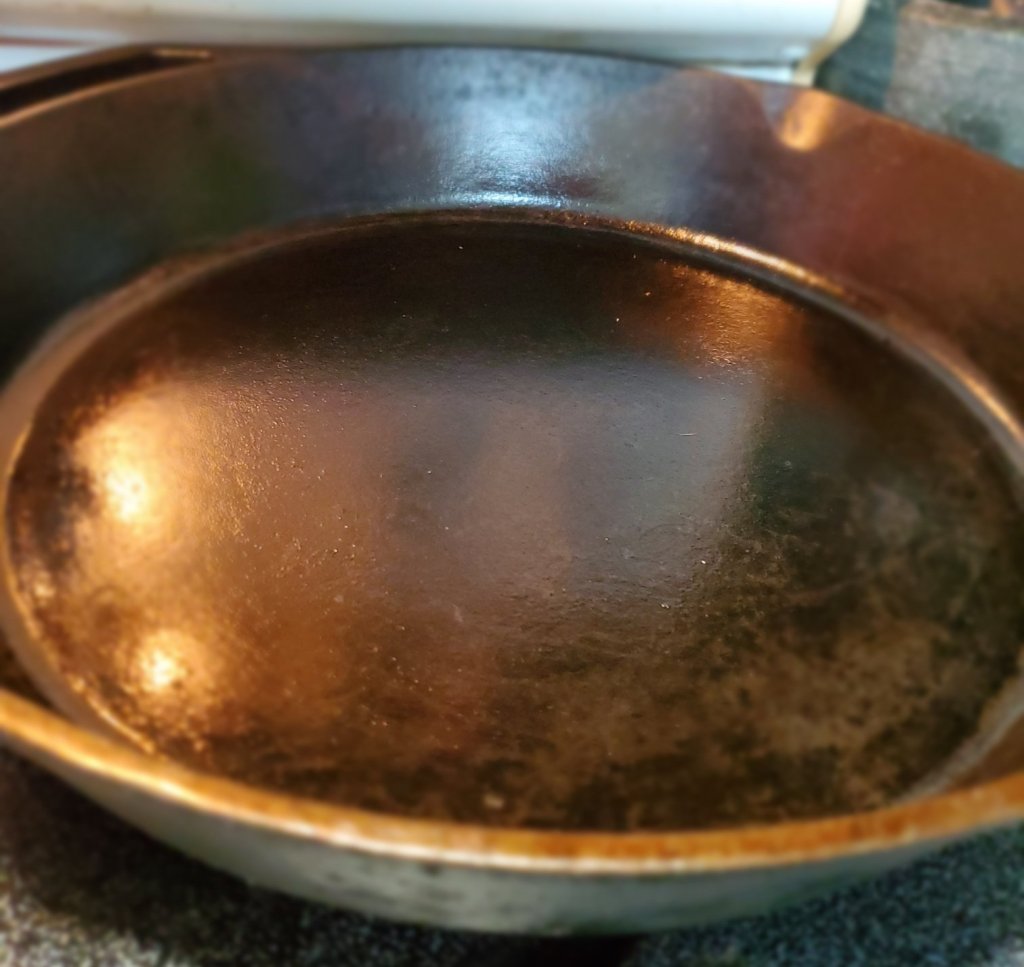
I don’t know about you but I am a Pampered Chef fanatic. I have collected many of their quality products over the past twenty years or so. Today in this particular meal I used one of my favorites from them, my grill pan. It’s great to grill indoors on, and the best part is it’s non stick! The other plus to this pan is you can use metal utensils, the handle comes off so you can also use it in the oven. It’s so versatile.

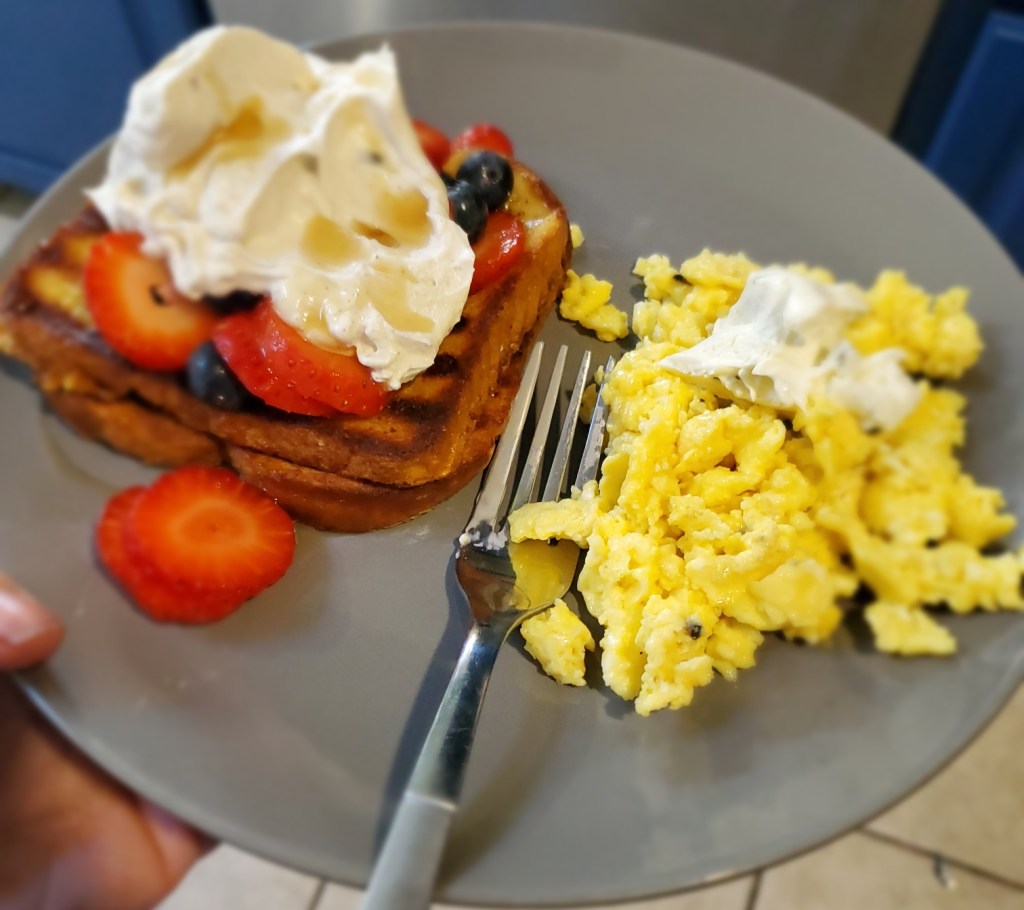
Growing up, French toast was always my favorite meal for breakfast, and sometimes for dinner. Honestly, I could eat it any time of the day! Now, as far as today goes I have to say I will definitely be making cinnamon whipped cream again and the secret that balanced the sweetness of this meal was……………. chive and onion cream cheese in the scrambled eggs. Not a lot, just enough is also key to just about everything to do with this dish. The French toast also has a maple syrup drizzle over it, but doesn’t need it if you feel that’s too much richness.

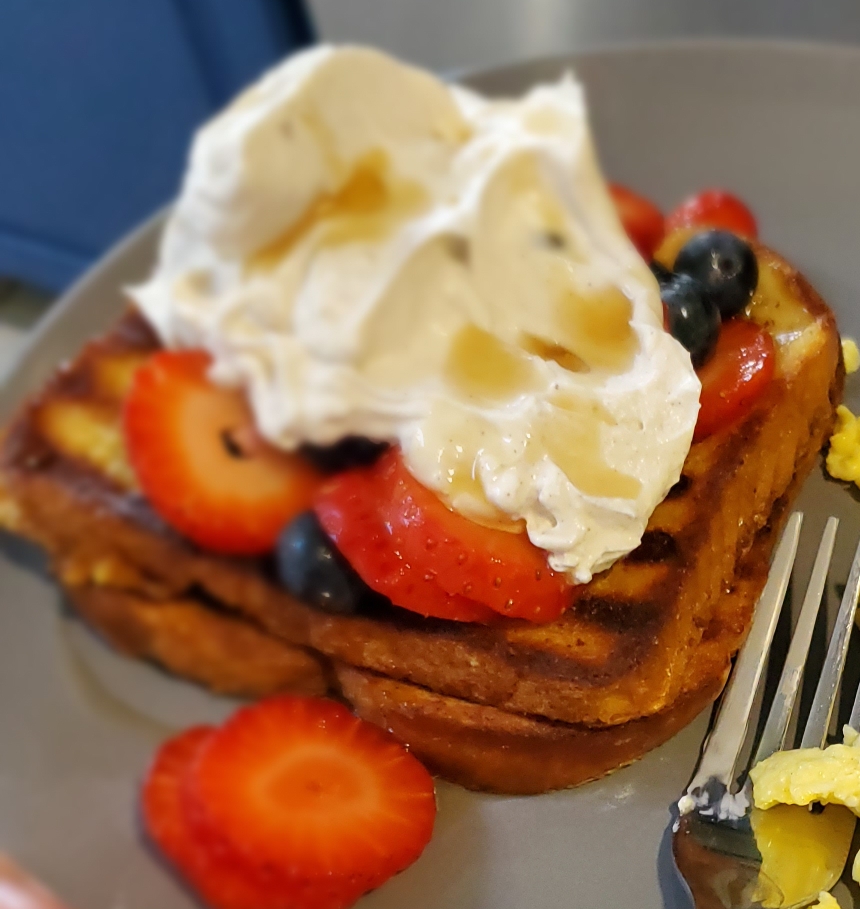
French Toast with Whipped Cream & Fruit

Ingredients

French Toast

  1. 4 slices of bread
  2. 1/4 cup of half and half
  3. 1 egg
  4. 1 tsp cinnamon
  5. 1 tsp nutmeg
  6. Pinch of salt

Fruit Garnish

  1. 2-3 handfuls of blueberries
  2. 5-6 strawberries sliced

Cinnamon Whipped Cream

  1. 1 cup heavy cream
  2. 1 tsp vanilla extract
  3. 1 tbsp sugar
  4. 1 tsp cinnamon

Instructions

  • Start by washing and preparing fruit for garnish. Put together in a bowl and set aside.
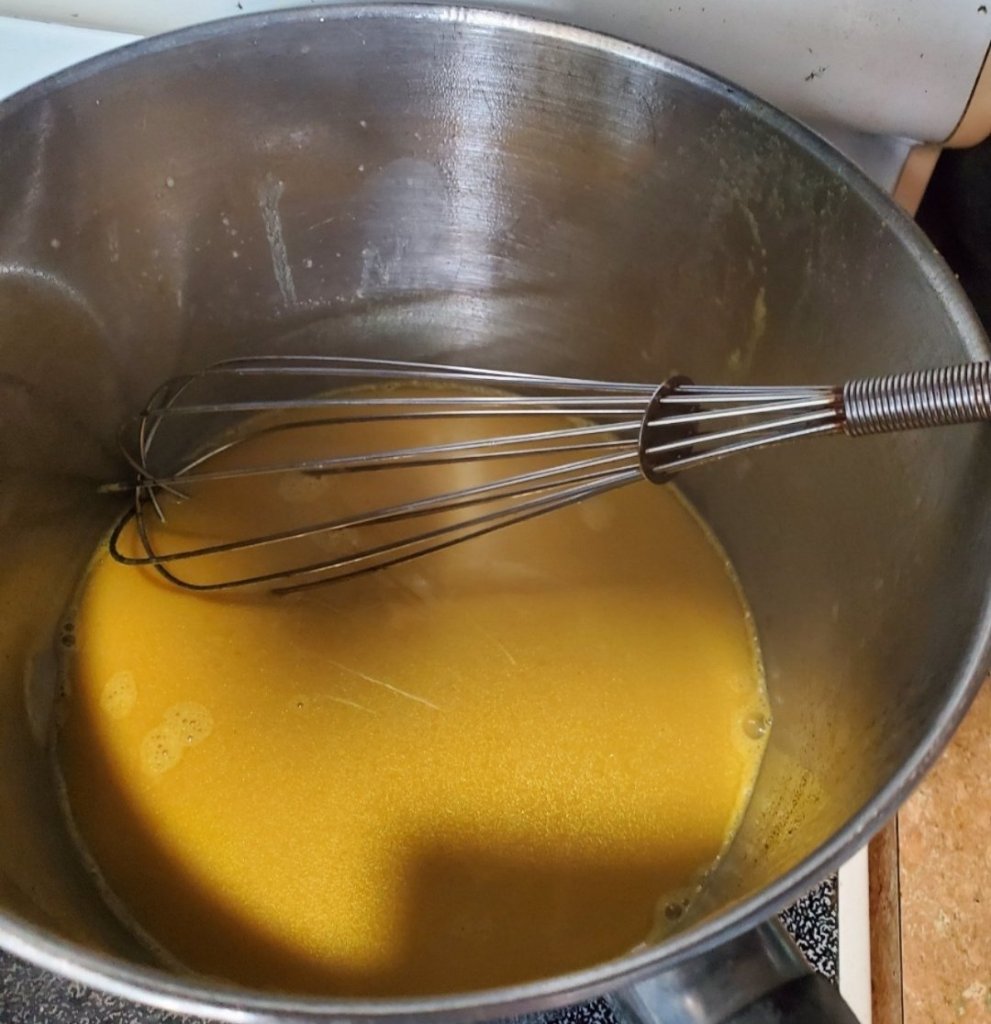
  • Beat egg in shallow dish, add half and half and spices for French toast and whisk together.
  • Once grill pan or griddle is hot with medium/ low heat, add butter. Once melted, dip each piece of toast making sure both sides are well coated in egg mixture, and place in pan.
  • Cook each side until golden brown.
  • While toast is cooking place whipped cream ingredients in a bowl and mix with electric mixer until you have whipped cream.
  • Place two pieces of French toast on plate, garnish with fresh fruit, a dollop of whipped cream and a maple syrup drizzle.

Loaded baked potato soup with leeks in the Instant Pot

Loaded Baked Potato Soup

     So when I first started cooking in my Instant Pot I was extremely overwhelmed and intimidated.  I have to admit it took me a minute to understand the concept, but then again I’m an over thinker to the bone.  

     The one thing that helped me the most was a recipe book I was gifted, titled, “Six Ingredients Or Less,” by Ivy Manning.  These recipes will guide you through the basics without complications and I promise you will gain the skill to master the Instant Pot. 

     Once you start to gain confidence, these recipes are easy to add your own flare to.  They also have helped me branch out internationally wise when it comes to cooking.

     One of the first recipes I decided to make in this particular cook book was Loaded Baked Potato Soup.  Super easy but super filling.

Onion & Leeks Sautéing

    Now like I said early, there is plenty of room for additions when the ingredient list is so light, so in this case I sometimes add two cloves of garlic minced and two leaks sliced.  Oh the extra flavor is delicious!

     The recipe calls for cooked bacon crumbles for garnish.  I usually lay the four pieces out flat on parchment paper on a cookie sheet and place in a 400° oven for 18 minutes. I usually transfer right away to a plate with paper towels to eliminate some of the oil.  Green onion, shredded cheddar, bacon, and sour cream make the most perfect garnishes for such a delicious and hearty soup!

Bacon

Loaded Baked Potato Soup

Ingredients

  • 1 tbsp olive oil
  • 3 large russet potatoes cut into 1 inch chunks
  • 2 1/2 cups broth
  • 1 large yellow onion diced
  • 1/2 cup sour cream
  • 4 pieces cooked bacon crumbled
  • 4 green onions slices
  • 1 1/2 cups shredded cheddar

Instructions

  1. Hit sauté and adjust to normal/medium heat.  When the pot is hot add oil.  When oil is hot add onions.  If you are adding leeks and garlic like I did, I add them right now also.  Cook until tender, about 5 minutes.  Press cancel.
  2. Now add potatoes, broth, and 3/4 teaspoon of salt.  Lock lid, select the pressure cook function, and adjust to high pressure function,  (if yours has that feature, mine does not) and cook for 5 minutes.  Make sure valve is in the “Sealing” position.
  3. When cooking time is up, quick release the pressure.  Remove lid once pressure is gone and add sour cream and 3/4 cup of cheese.   Stir gently with rubber spatula until cheese has melted and largest chunks of potato are broken down. Season with salt and pepper.
  4. Serve with garnishes.

Slow Cooking with The Instant Pot

     So I love to cook on or with just any anything.  I haven’t dabbled in cooking underground yet but I’ll get there, it’s on my list!  So with that being said, I love my Instant Pot.  I would say I use it a lot, from making homemade broth to dinner its a real winner for me!  And I’m going to tell you why.

     So there are so many things you can do like make your own vanilla extract, yogurt, etc.  They’re on my list too, don’t you worry.  Today let’s talk about slow cooking and why I love it in the Instant Pot. 

     I am not going to lie, it took me a hot minute to figure out the slow cooking on this crazy super machine, but I think I’ve got the hang of it now!  The functions and heat settings took me a minute to get used to over a traditional Crock Pot. 

     So my first reason to love this as my slow cooking option is the sauté function.  Now I can sear my meats and get my other ingredients fragrant before setting and forgetting.  No pot or pan to wash!!! That is a huge win for me alone.  Searing is so incredibly important to having a delicious outcome.  And I can do it right in the pot that everything is going to slow cook in.   That’s mind blowing.

     Now, the other reason why I love slow cooking in the Instant Pot is that if it’s not tender enough when it’s done or it just didn’t cook enough, you can slide the vent closed and pressure cook for a few minutes and it’s all good!  Problem solved.  This thing actually comes with its own back up plan.  So even if you’re not handy in the kitchen you can do this.  I promise you that. Below I will leave my favorite classic chili recipe that I actually use in my Instant Pot at home all the time! Enjoy!

Classic Chili

Ingredients

  • 1 pound ground beef
  • 4 stalks of celery chopped
  • 1 large onion chopped
  • 4 cloves of garlic roughly chopped
  • 1 jalepeno minced
  • 3 tbsp grated carrot
  • 1 red or green bell pepper
  • 2 tbsp minced parsley
  • 1 can diced tomatoes
  • 15 ounces tomato sauce
  • 1 can red kidney beans
  • 3 cups beef or vegetable stock
  • 3 tbsp chili power
  • 2 tbsp cumin
  • 2 bay leaves
  • 1 tbsp garlic powder
  • 1 tbsp onion powder
  • 1 tbsp tomato paste
  • Salt & pepper to taste
  • 1 tbsp red wine vinegar
  • 1 tbsp olive oil
  1. Start with putting the Instant Pot on sauté and letting the pot heat up. Once hot, add the olive oil. Next add the ground beef and brown.
  2. Once meat is almost cooked add onion, peppers, and garlic and cook about 1-2 minutes.
  3. Add red wine vinegar and scrape bottom of pot. Turn off sauté function and add all remaining ingredients. Stir to combine.
  4. Place lid on and make sure vent is not sealed and place slow cook on. Set on medium for 6-8 hours roughly.

The Cast Iron Skillet

     When I moved out of my mom’s house at 17, I didn’t know my way around a kitchen very much.  Maybe I could drop some fry chicken at work and set a timer, but cooking an actual meal could have gone great or not so great back then. 

     My mom didn’t own any cast iron pans when I was growing up.  She had fallen in love with all the new Teflon rage, so that’s what I learned to cook on.  Now fast forward, I’m living in my at the time boyfriends parents house, 17 years old and they had cast iron pans that I was totally afraid to use.  I was so confused because this pan rarely was washed and that kinda grossed me out.

     After I left there I never really dabbled into cast iron again until now.   One day my hubby and I were watching a cooking show and they explained how to take proper care and use your cast iron.  I immediately became less intimidated.  And I’m so glad I opened up to it. 

     Knowing things like bringing things to room temperature before searing is super important!  Just as important as oiling your pan after every cleaning.   After using your cast iron for a while it develops a seasoning that will only add to each of your dishes. And absolutely nothing holds a even a temperature as my cast iron skillet.


Caring For Cast Iron

  1. Start by rinsing out and scraping bottom of pan.  I use my pampered chef scrapers for my stones or a metal spatula.
  2. Fill with water and place on stove.  Bring to boil and turn off.  I scrape the bottom again and then carefully pour out hot water and dry with paper towels.
  3. Place pan back on burner and wait until all water is dry and pan is slightly hot.
  4. Put a small quarter sized drop off oil in the bottom of pan, I prefer canola or olive oil, and remove from heat source.  Spread all over pan with folded up paper towel and store when cool for next use.


My favorite comfort dish

French Onion Soup Pork Chops

     This is my absolute favorite comfort meal, I love cooking it too.   Yummy, French Onion Soup Pork Chops, and of course mashed potatoes to compliment. Now, I follow this recipe from Pinterest, but I do one slice of provolone and one slice of mozzarella on top of each pork chop. That’s my only difference.

Now the most important part of executing this recipe is getting the onions caramelized just right, but you’ve got this! I love to do this in my cast iron skillet. It is my favorite pan! Nothing holds an even temperature like it so it’s perfect for this endeavor.

I preheat the oven 5-10 minutes on broil before I put them in to melt the cheese. I like to make sure it’s nice and hot.

I really hope you enjoy this dish as much as I do. The recipe will be be linked above. I paired mine with mashed potatoes and a creamy cucumber salad.

Dinner Tonight

     Earlier I decided to fry up an eggplant for dinner tonight.   I have had a craving for eggplant parmesan so yeah let’s do this! 

      One of the first things I like to do, is cut my eggplant and soak the pieces in salt water for about 5-10 minutes.  This takes away the bitterness. 

     I like to use Italian breadcrumbs, Italian seasonings, and fresh finely shredded parmesan cheese to coat my eggplant.  I also do the first dip in flour, then egg and milk bath, and then breadcrumbs mixture. 

     The cast iron skillet is my favorite place to fry them up with a little olive oil.  I make sure they’re golden brown and when finished I let cool until I can handle them. 

     For tonight’s eggplants parmesan I made gnocchi, extra sauce, and creamy leeks.  In the past we have just done a salad and a pasta of our choice.   I will say that the creamy leeks add a nice balance to the eggplant parmesan and gnocchi.  In some dishes I find the creamy leeks too rich but not with this dish tonight.

Eggplant Parmesan

Ingredients

  • 1 medium sized eggplant
  • 6 tbsp fresh shredded parmesan cheese
  • 2 cups Italian breadcrumbs
  • 1 tbsp Italian seasonings
  • 2 cups flour
  • 2 eggs
  • 1 cup milk
  • 1 jar Rao’s marinara
  • 4 cups shredded mozzarella

Directions

  1. Start by cutting your eggplant.  I like to cut them length-wise but you can cut them in circles also.  After the pieces are cut place them in salt water to soak for 5-10 minutes.  They like to float so I rotate the top to the bottom often.
  2. Whisk two eggs and milk together in shallow dish.  Place flour in another shallow dish.  In the third dish mix breadcrumbs, Italian seasonings, and 4 tbsp of the parmesan cheese in a third shallow dish. 
  3. Heat pan to medium heat, once hot, pour olive oil in pan and make sure bottom is covered.
  4. Remove bottom eggplant slice from water, and dredge in flour.  Next the egg mixture, and then finally coated in the breadcrumb mixture.
  5. Now to the pan, I turn it to medium-low while I’m doing this process so they don’t burn.  It can be a lot to handle.
  6. I keep an eye on the eggplant and flip when it becomes golden brown.
  7. When ready to remove from pan I place on a plate with a paper towel to drain excess oil.
  8. When cool enough to handle I start my assembly by first putting a couple spoonfuls of sauce on the bottom of my 9×13 glass oven dish and use the spoon to spread it all over the bottom of the dish.
  9. Next I place slices in the pan so that the bottom is covered.  Then I put a little sauce, parmesan, and mozzarella on top of each piece.  And then I repeat until there’s no eggplant left.  All remaining cheese goes on top!!!
  10. I put aluminum foil on top and bake at 375° for 30 minutes.   Then I remove the foil and bake another 5-8 minutes. 

Becoming my hippy self

      I have to confess!  I really didn’t want to drink the turmeric tea and be like one of what I considered, a health nut.  So, I’ve decided I’m going to slowly step into a more natural lifestyle without stressing about if some aspect of the journey doesn’t stick.

     So I think for me personally, I actually have stayed away from certain health superfoods and chemical free products because I didn’t want to be a part of a culture mainly.  Now two years after the start of a pandemic, I’ve branched out and I guess in my own way become more of a naturalist then I ever thought I would be.

     It’s been a slow process, and I’m by no means perfect, but there are just certain things I’ve done over the last two years to take control back of what comes into my home.

     This all started with essential oils.   I joined Young Living and a month later found myself recovering from a dislocated knee.   I didn’t want to go on antidepressants again so I turned to my new oils and meditation.  Thank goodness for these two!

     Once back on my feet, I started purchasing Young Livings laundry soap, bar soaps and thieves cleaner so I could keep some more chemicals out of the house.

Then one day I got to thinking about all the extra preservatives in foods and how I could eliminate some. So I started making my own broth with my scraps of veggies and meats. And then I started washing, chopping and freezing fresh vegetables when they’re in season. As well a learning to make my own tortillas, biscuits, etc.

So now as I sit here writing to all of you folks, drinking my turmeric tea, I can seriously say I never thought I’d be able to say it… but I can. I will leave the recipe for the tea below. It is delicious.

Turmeric Tea

  • 1 1/2 cups oatmilk
  • 1 tsp turmeric
  • 1 tsp cinnamon
  • 1/2 tsp ginger
  • Dash nutmeg
  • 1/2 tbsp local honey

Directions

  1. Add all ingredients to pot and bring to slow boil. Whisking to make sure all ingredients blend.
  2. Simmer for about 5 minutes.
  3. Whisk a bit too create a froth, and pour into favorite mug.
  4. Enjoy!

Curry Coconut Chicken

     Curry seasoning is one of my absolute favorite flavors to work with.  Sometimes I even add it to my homemade chicken soups because let’s face it, a little flavor never hurt no one!

     For this recipe I like to use bone-in chicken thighs, they just have such great flavor and texture.  After I trim the fat and excess skin off each one,  I put together my curry rub and I make sure I rub down each piece really well.  I personally like to let it marinate in the rub for 24-48 hours.

     When cooking time arrives, I get my pan heated to medium-high and add a little olive oil and butter so I can get a good sear on the chicken thighs.  This is so important, because it keeps the chicken juicy.   After I have nice golden brown chicken thighs I set them aside on a plate and now the real magic begins.  We eat this dish by itself or over rice.

Curry Coconut Chicken

Ingredients for Curry Rub

  • 3 tbsp curry seasoning
  • 1 tbsp turmeric
  • 1 tbsp onion powder
  • 1 tbsp garlic powder
  • 1/2 tbsp salt
  • 1/2 tbsp pepper

Ingredients

  • 4 chicken (bone-in) thighs
  • 4 cups chicken or veggie broth
  • 2 carrots chopped
  • 2 celery stalks chopped
  • 1 yellow onion chopped
  • 4 cloves of garlic minced
  • Red bell pepper chopped
  • 1 russet potatoes chopped
  • 1 jalepeno minced
  • 1-2 bay leaves
  • 1 zucchini chopped
  • 1 yellow squash chopped
  • 2 ears of corn cut into small pieces
  • 1 can of coconut milk
  • Handful of grape tomatoes whole
  • Handful of cilantro chopped
  • 1-2 tbsp of olive oil
  • 2-3 tbsp of butter

Directions

  1. Make the rub up and make sure the chicken is covered in the mixture.   Place in container or ziplock and place in refrigerator and marinate for 2 to 48 hours.   The longer your wait the better the flavor.  
  2. Ready to cook?  Start by heating your pan to medium- high heat on the stove top.  The trick to a good sear is making sure you let your meat come down to room temperature before placing in the hot pan.  Add a little oil, then some butter. After melted, place chicken skin-side down and allow to sear.  Maybe 3-5 minutes.  Then flip and do the same thing for the other side, adding more butter of needed.
  3. Remove chicken and place on plate to the side.   Add onions, garlic, red pepper, and jalepeno to the pan and scrape all brown bits off bottom of the pan.   Continue to cook and stir until fragrant, about 3-4 minutes. 
  4. Next add the celery, carrots, corn on the cob pieces, and potatoes then stir.  Add broth, stir again, and then nestle the chicken thighs back into the pan.  Place zucchini, squash, and tomatoes on top and wait to broth comes to a boil.
  5. Reduce heat to simmer & cover. Cook for 30 minutes more or until chicken is cooked thoroughly.
  6. Remove lid, add coconut milk, stir and cook on medium low into heated through. Serve by itself or over rice. Garnish with cilantro and enjoy.

Grilled Leeks & Radishes

I can honestly say I had never cooked a leek or a radish until 39 years of age. Crazy I know, but totally true. So of course, like most people I turned to Pinterest for recipe ideas and more, because I definitely didn’t just want to make leek & potato soup.

After getting a few ideas I decided to try the leeks grilled in a grill pan on the stove and I added some radishes just for fun. I whipped up a lemon parmesan dressing from scratch to go over once finished and shaved some parmesan to garnish. It was delish!

Make sure you wash your leeks after you cut them. They can be really dirty inside. I actually cut the bottom of the leek off and place it in water for a few days and then replant them in my garden. I also do this with all my green onion.

1 day in water

Grilled Leeks & Radishes

Ingredients

  • 2 leeks
  • 5 Radishes
  • 1 tbsp olive oil
  • Salt & pepper

Dressing Ingredients

  • 1/2 lemon juiced
  • 1/2 lemon zest
  • 2 tbsp grated parmesan cheese
  • 3 tbsp olive oil
  • 1 clove of garlic minced
  • 1-2 splashes worsteshire
  • Salt and pepper

Garnish: shaved parmesan

Directions

Start by cutting off all dark green parts of leeks. Now cut the stalk into about 4 inch sticks and then cut lengthwise in half. I usually place in a colander and rinse them out really well and then I dry them a bit with paper towels.

Cut the Radishes in half and add them and the leeks to a bowl. Next add olive oil and salt and pepper to your liking and stir until everything is coated.

Next, add veggies to medium high heat on either a grill or grill pan on the stove. Cook for a about 5-8 minutes stirring every so often, until you see good grill marks appearing.

Remove from heat source and place in bowl, add dressing, mix and then garnish with shaved parmesan and serve!

Homemade Scrap Broth

     So, I’m sure you are already scratching your heads, wondering what the heck I’m talking about.  If you continue reading, great news, you’re going to find out!  But, before I divulge the answer to the big question, I would like to tell you why I prefer to make my own. 

     As many of you know, broth is expensive, and in some of my experiences, what I’ve bought from the store really hasn’t had flavor.  So I decided to start making my own but didn’t want to just use my meats and veggies just for broth, which really got me thinking…. why not freeze my scrap veggies in a ziplock in the freezer and use it later to make broth!!! Why don’t I trim my meats and freeze the trimming and left over bones I cut off and make homemade bone broths?

Every day food prep scraps I throw in a ziplock and freeze until ready to make broth.

     So, I started looking up recipes for the instant pot and boom the next thing ya know, I have my own broth that I can control the flavor and the sodium levels for the perfect fit in my household.  Now of course, I tweaked it a little and put my own flares here and there but over all I needed just a general place to start! I usually use one gallon ziplock full of vegetable scraps to make one recipe of vegetable broth.  For meat broth I wait until I have 2-3 pounds of scrap and I add about 4 cups of the vegetable scraps to it.   I also add about a tablespoon of tomato paste, whatever fresh herbs I have lying around at the moment, and a bay leaf.  I also add salt and pepper to my preferred liking, but honestly the broth is so fresh the flavor really shines most.

     I immediately strain my broths into an 8 cup glass measuring cup and allow to cool.   If it is just vegetable broth I just allow to cool enough to pour into Mason jars, if it had a meat in it, then I let it continue to cool in the measuring cup with a lid on in the refrigerator until a fat cap appears.   I then remove fat cap with slotted spoon and then pour remaining broth into Mason jars. 

     So far this method to me has been pretty painless and easy, and the rewards are endless!  No preservatives, lower sodium, and amazing flavors!!!  Look for my recipes below!

Homemade Veggie Broth from Scraps

Ingredients

  • 1 ziplock full veggie scraps frozen
  • 8 cup water
  • 2 bay leaves
  • 1 tbsp tomato paste
  • Salt and pepper to taste
  • Fresh rosemary or thyme

Directions

Add all ingredients to instant pot.   Close lid and set timer for 22 minutes, and make sure it’s sealed. Let come down naturally for 30 minutes.

Release the rest of the pressure, allow to cool and then pour through a strainer into 8 cup glass measuring cup. Allow to cool some more and then stir and pour into Mason jars of your choosing. I like the 16oz jars. Let come to room temp and refrigerate until ready to use. I would say stays good for one to two weeks.

Tips: Cut back the veggies and add about 2 pounds of chicken, beef, bone scraps or even shrimp heads and shells, for a meat or seafood broth. I up the cooking time to 35 minutes and still let the pressure come down the full 30 minutes. You will leave this one in the 8 cup measuring cup and place a lid on it after straining. Then place it in the fridge until a fat cap forms on top. Remove the fat cap with a slotted spoon and then put in jars and refrigerate. The seafood broth won’t have a fat cap, but will need to cool to room temperature. It is the perfect start to a great gumbo!

Design a site like this with WordPress.com
Get started